Installation of Next.js - App Router (app/)
A comprehensive guide to installation of Next.js - App Router (app/)

Next.js is a React framework for building full-stack web applications. Learn more at nextjs.org/docs.
Why Use a Framework?
A framework like Next.js provides pre-defined routes that enable fast communication between the server (SSR - Server Side Rendering) and the client (CSR - Client Side Rendering). You also avoid complications related to connecting your pages.
Your full-stack web application should be fast, scalable, stable, and secure.
Prerequisites
We will use Windows, Command Prompt, and VSCode for this tutorial.
Getting Started
In Command Prompt, navigate to the folder where you want to build your project and run:
npx create-next-app@latest
You'll see the following prompts during installation:
| Question | My Answer | Why |
|---|---|---|
| What is your project named? | my-app | Choose any name you like |
| Use TypeScript? | Yes | Improves code quality, prevents bugs, and is industry standard |
| Use ESLint? | Yes | Helps you write cleaner, consistent code |
| Use Tailwind CSS? | Yes | Awesome for fast UI building and responsiveness |
Use src/ directory? | Yes | Keeps your project structure organized and scalable |
| Use App Router? | Yes | The future of Next.js - supports layouts, loading states, and server components |
| Use Turbopack? | No | Still experimental - stick with Webpack for now |
| Customize import alias? | Yes | Cleaner imports: @/components/Button instead of ../../../components/Button |
For the last question about import alias configuration, just press Enter to accept the default @/*.
Then navigate to your project and install dependencies:
cd my-app
npm install
code .
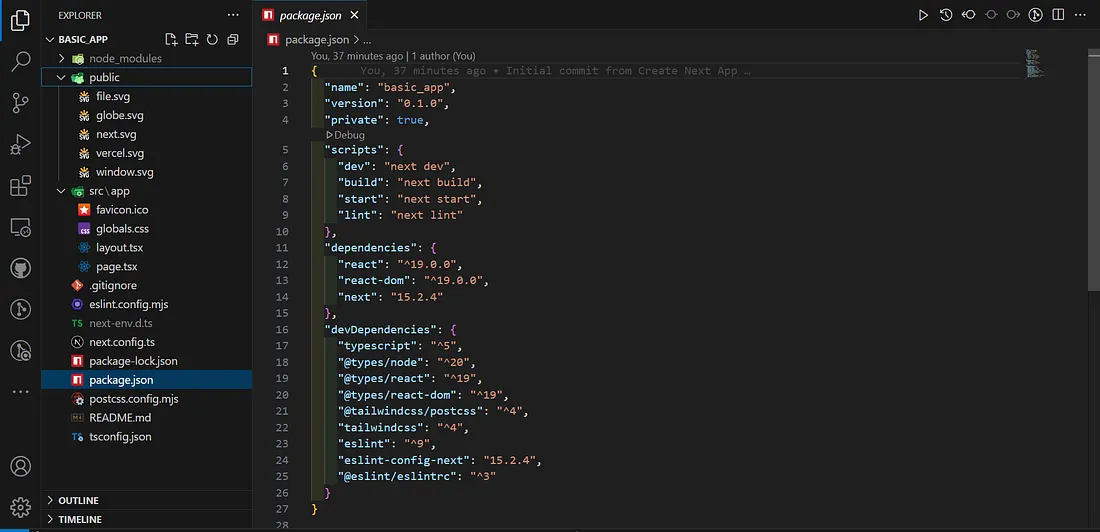
Note: This installs the latest versions of Next.js, React, TypeScript, and Tailwind CSS.
Caution: Tailwind 4.x is significantly different from previous 3.x versions!
Project Structure
After installation, you'll have:
Note: at the time the article was written, the current version for Next was 15.2.4; now it is 16.x.x
src/app/page.tsx— Home page (equivalent topages/index.tsxin Pages Router)src/app/layout.tsx— Root layout (equivalent topages/_app.tsxin Pages Router)src/app/globals.css— Global styles with Tailwind imported as@import "tailwindcss";
Tip: If your imports show red squiggly lines in VSCode, add
.tsxto the end of the import path and then remove it. This refreshes the TypeScript language server.
Building the Application
We'll add three pages and three components.
Pages
src/app/page.tsx (Home)
export default function HomePage() {
  return (

      Welcome to My App
      This is the home page built with Next.js App Router and Tailwind CSS.

  )
}
src/app/intro/page.tsx
export default function IntroPage() {
  return (

      Introduction
      Here you can introduce yourself, your project, or your company.

  );
}
src/app/about/page.tsx
export default function AboutPage() {
  return (

      About
      This is the about page. Talk about your mission, vision, or background.

  );
}
src/app/contact/page.tsx
import ContactForm from '@/components/form/ContactForm'

export default function ContactPage() {
  return (

      Contact Us
      Feel free to reach out by filling the form below.


  )
}
Layout
src/app/layout.tsx
import './globals.css'
import type { Metadata } from 'next'
import Header from '@/components/Header'
import Footer from '@/components/Footer'

export const metadata: Metadata = {
  title: 'My App',
  description: 'Built with Next.js App Router',
}

export default function RootLayout({
  children,
}: {
  children: React.ReactNode
}) {
  return (


        {children}


  )
}
Note: Red squiggly lines for Header and Footer imports will disappear once you create those component files.
Components
Create a components folder inside src, then add the following files.
src/components/Header.tsx
"use client";

import Link from "next/link";
import { usePathname } from "next/navigation";

export default function Header() {
  const pathname = usePathname();

  const navItems = [
    { href: "/", label: "Home" },
    { href: "/intro", label: "Intro" },
    { href: "/about", label: "About" },
    { href: "/contact", label: "Contact" },
  ];

  return (


        MyApp

          {navItems.map((item) => (

              <Link
                href={item.href}
                className={`hover:underline ${
                  pathname === item.href ? "text-yellow-400" : ""
                }`}
              >
                {item.label}


          ))}


  );
}
src/components/Footer.tsx
export default function Footer() {
  return (

      © {new Date().getFullYear()} MyApp. All rights reserved.

  );
}
src/components/form/ContactForm.tsx
"use client";

import { useState } from "react";

export default function ContactForm() {
  const [formData, setFormData] = useState({
    name: "",
    email: "",
    message: "",
  });

  const handleChange = (
    e: React.ChangeEvent
  ) => {
    const { name, value } = e.target;
    setFormData((prev) => ({ ...prev, [name]: value }));
  };

  const handleSubmit = (e: React.FormEvent) => {
    e.preventDefault();
    console.log("Form submitted:", formData);
    alert("Message sent!");
    setFormData({ name: "", email: "", message: "" });
  };

  return (


        Name


        Email


        Message


        Send Message


  );
}
Recommended Component Organization
As your project grows, organize components like this:
components/
├── ui/
│   ├── Button.tsx
│   ├── Input.tsx
│   └── Spinner.tsx
├── layout/
│   ├── Layout.tsx
│   └── Sidebar.tsx
├── nav/
│   ├── Header.tsx
│   ├── Footer.tsx
│   └── MobileMenu.tsx
├── forms/
│   ├── LoginForm.tsx
│   └── ContactForm.tsx
└── icons/
    └── SearchIcon.tsx
Common component categories include UI/reusable elements, layout components, navigation, form components, specialized widgets, icons, themed components, and transition components (using Framer Motion or GSAP).
Working with Assets
Images
Place images in public/images/ and reference them directly:
Or use the optimized next/image component:
import Image from 'next/image';
Fonts
Place custom fonts in public/fonts/ and register them in src/app/globals.css:
@font-face {
  font-family: 'Fira Code';
  src: url('/fonts/FiraCode-Regular.woff2') format('woff2');
  font-weight: 400;
  font-style: normal;
  font-display: swap;
}

body {
  font-family: 'Fira Code', monospace;
}
Running Your Application
Open the terminal in VSCode and run:
npm run dev
You should see:
▲ Next.js 15.2.4
- Local:        http://localhost:3000
- Network:      http://192.168.1.12:3000

✓ Ready in 1578ms
Open http://localhost:3000 in your browser to see your app.
Troubleshooting Hydration Errors
If you see a red hydration notice, it's likely caused by a browser extension injecting attributes into the DOM.
Why This Happens
Next.js SSR outputs clean HTML, but browser extensions (password managers, ad blockers, dark mode tools) may inject attributes like cs-shortcut-listen="true". When React hydrates on the client, it detects a mismatch between server and client HTML.
How to Confirm
Open an incognito window or disable all extensions, then reload your app. If the error disappears, an extension is the culprit.
Common Culprits
Password managers (LastPass, 1Password), ad blockers, dark mode extensions (Dark Reader), accessibility tools, and dev tool plugins.
Solutions
Disable the extension during development, test in a browser profile without extensions, or simply ignore the warning if it only appears in your development environment with extensions enabled.
Your layout code is fine. The mismatch comes from injected attributes by browser extensions, not from your application code.