Installation of tailwind 4.0 + vite
A detailed guide to using tailwind 4.x in the Vite environment for React.

Installing Tailwind CSS 4.0 with Vite and React
Tailwind CSS v4.0, released in January 2025, brings a completely reimagined developer experience. The new version is up to 5x faster for full builds and over 100x faster for incremental builds. It also introduces CSS-first configuration — meaning you no longer need a tailwind.config.js file for most projects.
This guide walks you through setting up Tailwind CSS 4.0 with Vite and React (JavaScript or TypeScript) in under 5 minutes.
What's New in Tailwind v4?
- No configuration file needed — automatic content detection finds your templates
- Single CSS import — just
@import "tailwindcss"instead of multiple@tailwinddirectives - Built-in tooling — import handling, vendor prefixing, and syntax transforms included
- First-party Vite plugin — tighter integration for maximum performance
Step-by-Step Installation
1. Create a New Vite Project
Open your terminal, navigate to your desired folder, and run:
npm create vite@latest project_name
When prompted:
- Select React
- Choose JavaScript or TypeScript (your preference)
2. Navigate to Project and Install Tailwind
cd project_name
npm install tailwindcss @tailwindcss/vite
3. Open the Project in Your Editor
code .
4. Configure Vite
Open vite.config.js (or vite.config.ts for TypeScript) and update it:
import { defineConfig } from "vite";
import react from "@vitejs/plugin-react";
import tailwindcss from "@tailwindcss/vite";

// https://vite.dev/config/
export default defineConfig({
  plugins: [react(), tailwindcss()],
});
5. Set Up Your CSS
Open src/index.css, remove all existing code, and replace with:
@import "tailwindcss";
That's it — just one line!
6. Verify main.jsx (or main.tsx)
Your entry file should import the CSS. It should look like this:
import { StrictMode } from 'react'
import { createRoot } from 'react-dom/client'
import './index.css'
import App from './App.jsx' // Use App.tsx for TypeScript

createRoot(document.getElementById('root')).render(
  <StrictMode>
    <App />
  </StrictMode>,
)
7. Create Your First Component
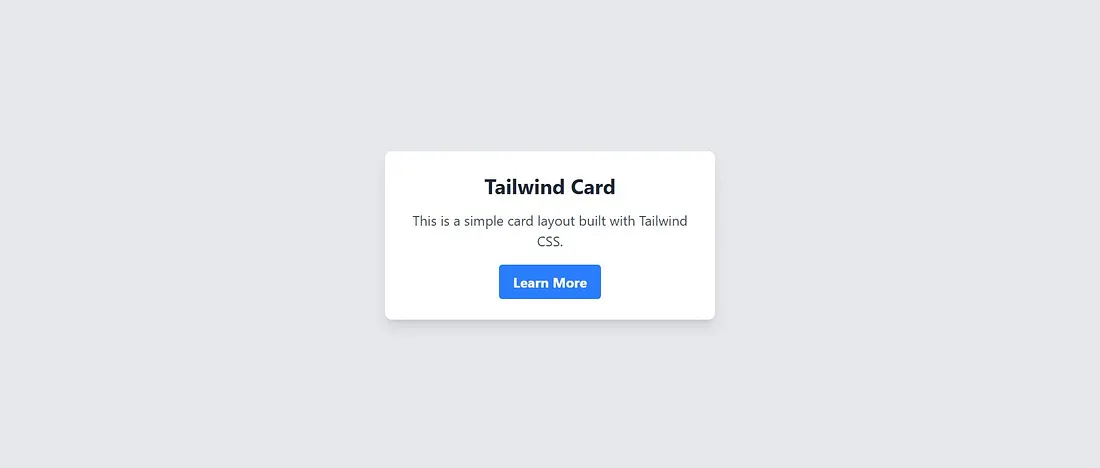
Open src/App.jsx (or src/App.tsx), remove all existing code, and try this example:
function App() {
  return (
    <div className="bg-white p-6 rounded-lg shadow-lg max-w-sm text-center">
      <h2 className="text-2xl font-bold text-gray-800">Tailwind Card</h2>
      <p className="text-gray-600 mt-3">
        This is a simple card layout built with Tailwind CSS.
      </p>
      <button className="bg-blue-500 hover:bg-blue-700 text-white font-bold py-2 px-4 rounded mt-4">
        Learn More
      </button>
    </div>
  );
}

export default App;
8. Update index.html (Optional)
For a centered layout with a background, update index.html:
<!doctype html>
<html lang="en">
  <head>
    <meta charset="UTF-8" />
    <link rel="icon" type="image/svg+xml" href="/vite.svg" />
    <meta name="viewport" content="width=device-width, initial-scale=1.0" />
    <title>Vite + React + Tailwind</title>
  </head>
  <body class="bg-gray-200 flex items-center justify-center min-h-screen">
    <div id="root"></div>
    <script type="module" src="/src/main.jsx"></script>
  </body>
</html>
TypeScript users: Change
src="/src/main.jsx"tosrc="/src/main.tsx"
9. Run the Development Server
npm run dev
You'll see output like:
VITE v6.x.x  ready in 500 ms

➜  Local:   http://localhost:5173/
➜  Network: use --host to expose
➜  press h + enter to show help
Open http://localhost:5173/ in your browser — you should see your styled card!
Project Structure
After setup, your project should look like this:
project_name/
├── node_modules/
├── public/
├── src/
│   ├── assets/
│   ├── App.css        ← optional (see below)
│   ├── App.jsx        ← or App.tsx
│   ├── index.css
│   └── main.jsx       ← or main.tsx
├── .gitignore
├── eslint.config.js
├── index.html
├── package-lock.json
├── package.json
├── README.md
└── vite.config.js     ← or vite.config.ts
Should You Keep App.css?
By default, Vite generates src/App.css, but it's not required when using Tailwind.
Option 1: Remove It (Recommended)
Since Tailwind handles all styling via utility classes, you can safely delete App.css:
- Delete
src/App.css - Remove the import from
App.jsx:
// Remove this line
import './App.css';
This keeps your project clean and fully Tailwind-based.
Option 2: Keep It for Custom Styles
If you need custom CSS that extends Tailwind, keep App.css and use @apply:
/* src/App.css */
.custom-button {
  @apply px-6 py-3 bg-red-500 text-white font-bold rounded-lg hover:bg-red-600;
}
Then use it in your component:
<button className="custom-button">Click Me</button>
Resources
Last updated: January 2025